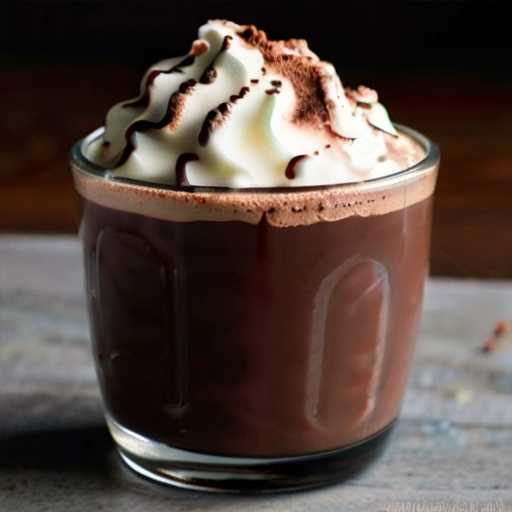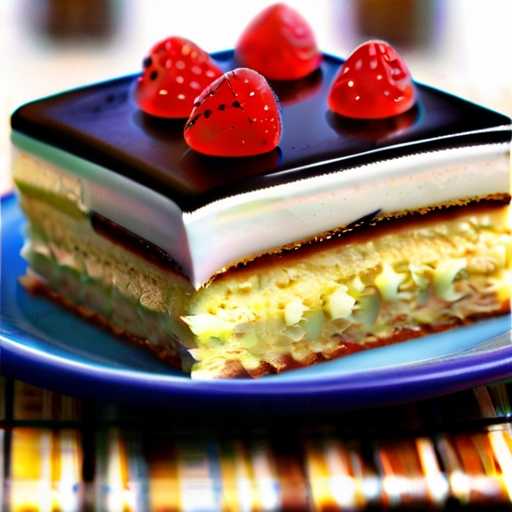
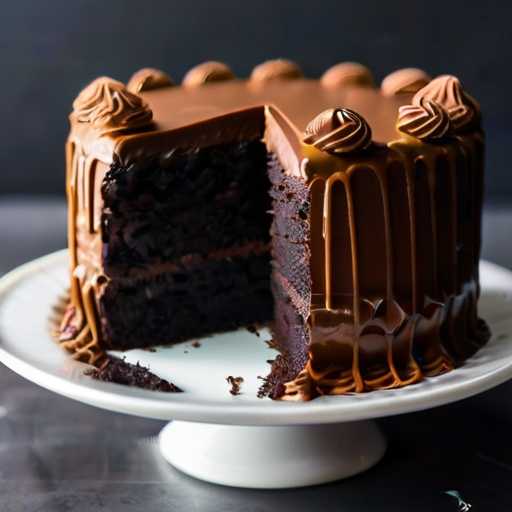
Easy Homemade Blackout Cake Recipe
Blackout cake recipes originated in the United States and were inspired by bakeries’ power outage restrictions during World War II. This easy homemade version boasts a decadent chocolate flavor and is perfect for satisfying your sweet cravings.
Homemade Blackout Cake Recipe
Cuisine
American
Difficulty
Easy
Preparation
20 minutes
Cooking
30 minutes
Ingredients for Easy Homemade Blackout Cake:
- For the Cake:
- • 1 3/4 cup all-purpose flour
- • 3/4 cup unsweetened cocoa powder
- • 2 cups granulated sugar
- • 2 teaspoons baking powder
- • 1 teaspoon baking soda
- • 1 teaspoon salt
- • 2 large eggs, room temperature
- • Whole eggs 1 cup milk
- • 1/2 cup vegetable oil
- • 2 teaspoons vanilla extract
- • 1 cup hot, brewed coffee (you can substitute hot water if you prefer)
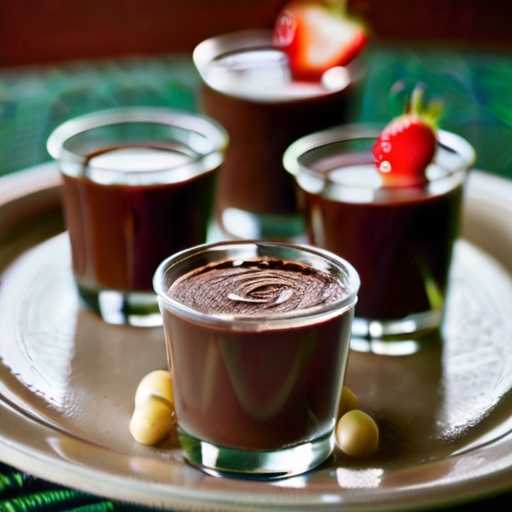
- For the chocolate pudding filling:
- • 1/2 cup granulated sugar
- • 1/4 cup cornstarch
- • 1/4 teaspoon salt
- • 2 1/2 cups whole milk
- • 4 large egg yolks
- • 6 ounces chopped semisweet chocolate
- • Unsalted butter 2 tablespoons
- • 2 teaspoons vanilla extract
- Chocolate Frosting:
- • 1 cup softened unsalted butter
- • 3 1/2 cups powdered sugar
- • 1/2 cup unsweetened cocoa powder
- • 1/2 teaspoon salt
- • 2 teaspoons vanilla extract
- • 4-6 tablespoons heavy cream, depending on consistency, or milk
- Optional garnish:
- • Chocolate shavings or sprinkles
- Alternative ingredients:
- • For a dairy-free version, almond milk You can use non-dairy milk such as or oat milk and use butter in place of butter. Vegan butter substitute.
- • For the gluten-free version, you can use gluten-free flour in place of all-purpose flour.
- •For the chocolate pudding filling, you can use dark his chocolate if you prefer a richer flavor, or dairy-free chocolate for a vegan option.
Easy Homemade Blackout Cake Preparation Steps:
- Directions:
- 1. Preheat oven to 350°F (175°C).
- 2. Grease and flour two 9-inch round cake pans or line them with parchment paper for easy access.
- 3. Gather your materials.
- Cake Batter:
- 1. Combine flour, sugar, cocoa powder, baking powder, baking soda, and salt in a large mixing bowl.
- 2. Add eggs, buttermilk, vegetable oil, and vanilla extract to dry ingredients.
- 3. Mix mixture on medium speed until well combined, about 2 minutes, scraping down sides of bowl as needed.
- 4. Slowly stir hot coffee or boiling water. You will have thin dough, but that’s to be expected.
- Baking:
- 1. Pour the batter evenly into the prepared cake pan.
- 2. Bake in the preheated oven for 30 to 35 minutes, or until a toothpick inserted in the center comes out clean.
- 3. Remove the cake from the oven and let it cool in the tin for 10 minutes.
- 4. After 10 minutes, carefully remove the cake from the pan and transfer to a wire rack to cool completely.
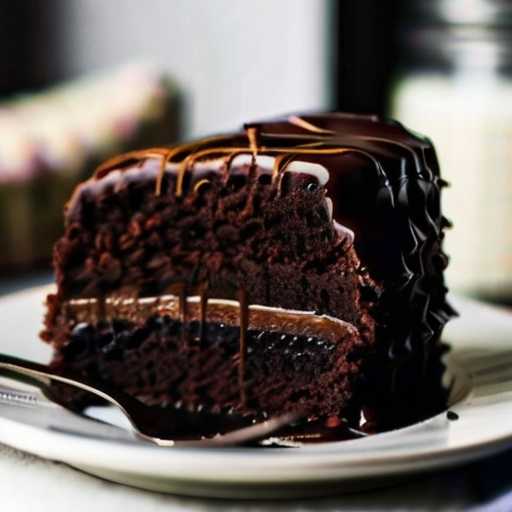
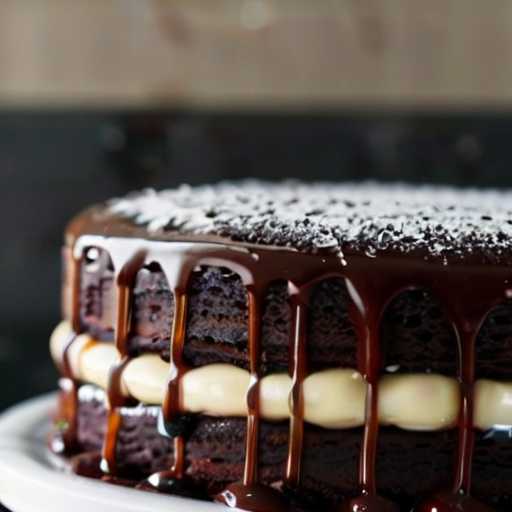
- Chocolate Ganache Frosting:
- 1. While the cake is cooling, prepare the chocolate ganache frosting:
- • 1 cup heavy cream
- • 8 ounces chopped semisweet chocolate
- • 2 tablespoons unsalted butter
- • Vanilla Essence 1 tsp
- 2. Heat the cream in a small saucepan over medium heat until it begins to boil. Removed from heat.
- 3. Add the chopped chocolate, butter and vanilla extract to the hot cream. Let stand for 1-2 minutes.
- 4. Stir the mixture until the chocolate and butter are completely melted and the ganache is smooth and glossy.
- 5. Let the ganache cool and thicken slightly before using it to frost the cake.
- 1. While the cake is cooling, prepare the chocolate ganache frosting:
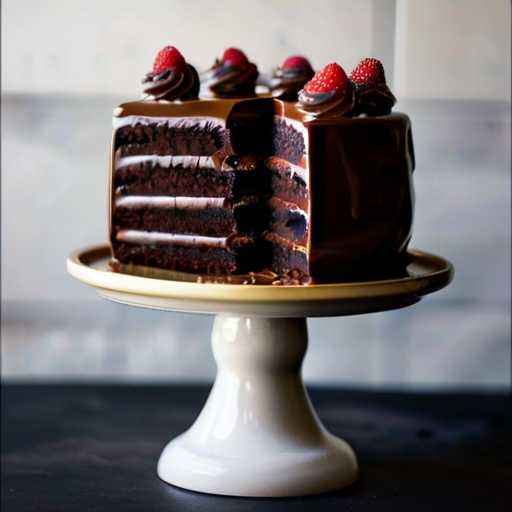
- Assemble the cake:
- 1. When the cake is completely cool, place one layer on a serving plate or cake stand.
- 2. Spread a generous layer of chocolate ganache icing over the first cake layer.
- 3. Carefully place the second cake layer on top.
- 4. Brush the remaining ganache frosting over the top and sides of the cake.
- 5. To add a special touch, you can sprinkle the cake with chocolate shavings or cocoa powder.
- Serve and Enjoy:
- 1. Let cake rest for at least 30 minutes, then cut into pieces and serve.
- 2. Store leftover cake in an airtight container at room temperature for 3 days or in the refrigerator for 5 days.
- Important Notes:
- • Use caution when handling hot coffee or boiling water.
- • Make sure the cake is completely cool before frosting to prevent the frosting from melting.
- • For a richer flavor, you can use dark chocolate instead of semisweet chocolate in the ganache icing.
Kitchen tools for easy homemade blackout cake recipes:
- 1. Mixing bowl: For mixing cake batter and icing.
- 2. Electric mixer or whisk: Used to beat eggs, sugar, and butter for cake batter.
- 3. Measuring cup and spoon: For accurately measuring ingredients.
- 4. Sift: Used to sift cocoa powder and flour to a smooth consistency.
- 5. Cake Pans: Two 8-inch round cake pans for baking cake layers.
- 6. Parchment paper: Line the cake tin to make it easier to remove the cake.
- 7. Wire cooling rack: Cools baked cake layers.
- 8. Offset spatula: Used to evenly distribute frosting among cake layers.
- 9. Cake stand or serving plate: For displaying the finished cake.
- 10. Pot: To heat and melt the chocolate black glaze ingredients.
- 11. Whisk: Used to stir and puree the glaze ingredients.
- 12. Sift: Sift the powdered sugar for icing.
- 13. Cake Decorating Tools (Optional): Piping bags, tips, etc. for decorating cakes.
- 14. Kitchen towels or oven gloves: For handling hot pots and utensils.
- 15. Knife or cake leveler: Use to level cake layers as needed.
- 16. Cake server or cake server: For serving slices of finished cake.
Tips to perfect the taste of this easy homemade blackout cake recipe with rich chocolate flavor.
- 1. High-quality ingredients: Choose high-quality ingredients, especially cocoa powder and chocolate. Using high quality cocoa powder and chocolate will enhance the overall flavor of the cake.
- 2. Sweetness Balance: Adjust the amount of sugar according to taste preference. Blackout cake usually has a strong chocolate flavor, so you may want to reduce the sugar a little to bring out the chocolate flavor.
- 3. Flavor Layer: Enhances the chocolate flavor by adding other complementary flavors such as coffee or espresso powder. Adding a small amount of freshly brewed coffee or espresso powder to the cake batter will enhance the chocolate flavor without giving the cake a coffee taste.
- 4. To use buttermilk: Replace some or all of the milk in the recipe with buttermilk. Buttermilk adds a tangy flavor and softens the crumb, creating a moist, flavorful cake.
- 5. Add Vanilla Extract: A little vanilla extract enhances the chocolate flavor and adds complexity to the cake. Use pure vanilla essence for the greatest flavor.
- 6. Do not overmix. Be careful not to overmix the dough. A dense, rough cake may come from this. Mix the ingredients well to make a soft and fluffy cake.
- 7. Correct baking time: Bake the cake until a toothpick inserted in the center comes out with a few moist crumbs. Overbaking can result in a dry cake. So keep an eye on it until near the end of the baking time.
- 8. Cool completely: Allow the cake to cool completely before frosting. This enhances the flavor and helps the glaze set.
- 9. Rich Chocolate Frosting: Use a rich and creamy chocolate frosting to enhance the flavor of your cake. If you want a more decadent touch, you can make a simple buttercream frosting or ganache frosting.
- 10. Serve at room temperature: For the best flavor and texture, serve the cake at room temperature. This will allow the flavors to fully develop and the cake to be juicy and tender.
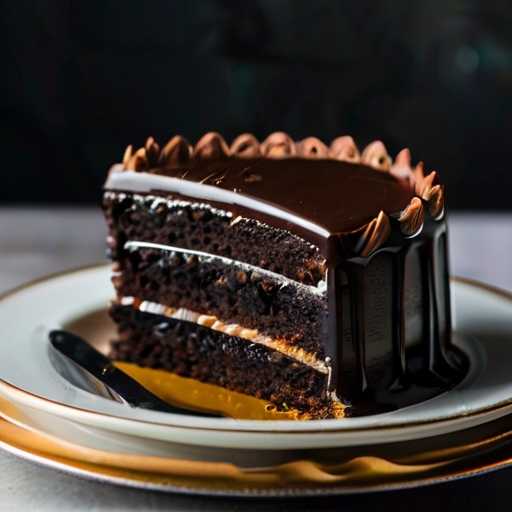
Serving Suggestions:
- 1. Serving Instructions: First, place a generous portion of the blackout cake on a clean, elegant dessert plate. Make sure the disc is properly centered for an attractive presentation.
- 2. Decorate: Lightly dust the surface of the cake with powdered sugar or cocoa powder to enhance its visual appeal. Alternatively, sprinkle chocolate shavings or curls over the slices for an extra sophisticated touch.
- 3. Garnish:
- • Fresh berries: Garnish with a handful of raspberries, strawberries, or blackberries for a touch of freshness and a hint of tartness to balance the richness of the chocolate.
- • Whipped cream: For those who want an extra creamy texture to their cake, offer a little whipped cream as a garnish.
- • Vanilla Ice Cream: Serve your cake with high-quality vanilla ice cream for a classic combination that creates a fun contrast of temperature and flavor.
- • Coffee or Espresso: Serve your dessert with freshly brewed coffee or espresso to enhance the deep, intense flavor of chocolate cake.
- 4. Presentation: Carefully arrange the garnishes and garnishes around the blackout cake on the plate to ensure a beautiful presentation that captivates the senses.
- 5. Enjoy: Invite your guests to savor every bite of our delicious blackout cake, taking their time to enjoy its rich chocolate flavor and velvety texture, along with carefully selected garnishes and accompaniments.
Easy Homemade Blackout Cake Storage and Leftovers:
- 1. Chill: Before storing leftover blackout cake, let it cool completely at room temperature. This will prevent condensation from forming inside the storage container and making the cake soggy.
- 2. Storage Container: Place leftover cake in an airtight container or cover tightly with plastic wrap. To keep the cake fresh, make sure the container is clean and dry.
- 3. Refrigerate: Blackout cake can be stored at room temperature for 1-2 days, but for longer storage it is best stored in the refrigerator. After the cake cools, store it in the fridge.
- 4. Freeze (optional): If you don’t plan on eating leftovers within a few days, consider freezing them to enjoy later. Wrap individual cakes or the entire cake tightly in plastic wrap and foil before placing in the freezer. Properly packaged blackout cakes can be stored in the freezer for up to 3 months.
- 5. Reheating Instructions: If you want to enjoy leftover blackout cake, there are several reheating options:
- • Microwave: To quickly reheat, place cake in a microwave-safe dish and heat on medium power. Microwave for 20-30 seconds. Make sure the cake reaches the desired temperature.
- • Oven: Preheat oven to 350°F (175°C). Place the remaining cake slices on a baking sheet and heat in the oven for 5 to 10 minutes or until warmed through. Avoid overheating to prevent the cake from drying out.
- 6. Plate and enjoy: Once warmed, serve blackout cake with ice cream or whipped cream, or simply enjoy on its own. Whether freshly baked or warmed up, the rich chocolate flavor is irresistible.
Nutritional information (per serving):
- • Calories: approx. 350-400 kcal
- • Fat: approx. 20-25 g
- • Protein: approx. 4-6 g
- • Carbohydrates: approx. 40-50 g
- • Dietary fiber : approx. 2-4 g
- Please note that these values are guidelines and may vary depending on specific ingredients and usage.
Health Benefits of Homemade Blackout Cake with Rich Chocolate Flavor:
- 1.Cocoa Rich in Antioxidants: Dark chocolate, a key ingredient in blackout cake, helps neutralize harmful free radicals in the body. , rich in antioxidants that potentially reduce the risk of disease. Chronic diseases that should be reduced.
- 2. Mood-enhancing properties: Eating chocolate stimulates the production of endorphins, brain chemicals that promote feelings of joy and well-being, thereby improving your mood.
- 3. Heart Health: Moderate consumption of dark chocolate is associated with improved heart health. Enhances blood flow and lowers the risk of cardiovascular disease.
- 4. Energy Boost: The natural sugars in Blackout Cake can provide a quick energy boost, making it the perfect choice for a mid-day pick-me-up or as a pre-workout snack.
- 5. Supports mental health: Eating blackout cake can help you relax and have fun, reduce stress, and promote overall mental health.
- 6. Improved cognitive function: Some research suggests that the flavonoids found in dark chocolate may have positive effects on cognitive function, such as improving memory and learning ability.
- 7. Feeling full: The combination of fat and fiber in blackout cake promotes feelings of fullness and satisfaction, which may reduce overall calorie intake throughout the day.
- 8. Enjoyment and Satisfaction: A balanced diet also includes rewarding yourself in moderation. Eating a slice of homemade blackout cake can be fun and satisfying without compromising your overall nutritional goals.
Variations you can try for an easy homemade blackout cake recipe with rich chocolate flavor:
- 1. Double Chocolate Treat: For an extra chocolate flavor, add some to the cake batter Add chocolate chips or chocolate chips.
- 2. Mocha Madness: Add a teaspoon of instant espresso powder to the cake batter to enhance the chocolate flavor and add a subtle coffee aroma.
- 3. Raspberry Infusion: Layer raspberry jam between the cake layers to create a delicious fruity note that complements the rich chocolate flavor.
- 4. Peanut Butter Power: Mix creamy peanut butter into cake batter before baking to create a decadent combination of chocolate and peanut butter.
- 5. Coconut Bliss: Sprinkle shredded coconut on top of the icing cake to give it a tropical feel and pair beautifully with chocolate.
- 6. Salted Caramel Sensation: Drizzle homemade salted caramel sauce over frosted cake to create a sweet and salty contrast and highlight the flavors.
- 7. Orange Zest Ging: Add orange zest to cake batter for a refreshing citrus accent that balances the richness of the chocolate.
- 8. Nutty treats: Mix chopped nuts, such as walnuts or pecans, into the cake batter to give it more texture and nutty flavor.
- 9. Cherry Chocolate Temptation: Place canned cherry pie filling between the cake layers to create the classic combination of chocolate and cherries.
- 10. Spiced elegance: Mixing a pinch of cinnamon or chili powder into the cake batter creates a subtle spicy note that complements the chocolate.
What makes our easy homemade blackout cake recipe special?
- 1.Decadent Chocolate Flavor: Our recipes are carefully crafted to deliver a super rich chocolate flavor that will tantalize your taste buds. Made with high-quality cocoa powder and premium chocolate, each bite is indulgent.
- 2. Moist and Soft Texture Unlike regular chocolate cake, blackout cake features a moist and soft crumb that melts in your mouth with every bite. The addition of buttermilk and oil creates a delicious texture that leaves you wanting more.
- 3. Deep, Dark Look: As the name suggests, our blackout cakes feature a deep, dark look that stands out on any dessert table. The velvety, cocoa-infused layer creates a striking visual contrast, making it as beautiful to look at as it is to eat.
- 4. Simple but impressive presentation: Our recipes are easy to prepare at home, yet exude a touch of sophistication and are perfect for any occasion. Whether served as a snack or a great dessert for a dinner party, this blackout cake always attracts attention.
- 5. Customizable options: Our recipes are already great, but there’s also room to customize them to your liking. Easily customize this blackout cake to your liking with classic ganache toppings, creamy frosting, and a dusting of powdered sugar.
- 6. FAMILY FRIENDLY AND A CROWF-FAVOR: Popular with kids and adults alike, Blackout Cake is a crowd-pleaser that’s sure to impress. Whether it’s a family gathering or a potluck with friends, this dessert is sure to be a hit with everyone.
- 7. Unforgettable Homemade Fun: Our blackout cake recipe is more than just a dessert, it embodies the warmth and comfort of homemade baking. Each piece is made with love and care, creating precious memories with every indulgent bite.
Recipe Notes:

- 1. Cultural Significance: Blackout cake holds a special place in American culinary history, representing the resilience and ingenuity of the wartime rationing era. Its enduring popularity reflects a love for delicious desserts that evoke feelings of nostalgia and comfort.
- 2. Quality of Ingredients: Use high quality cocoa powder and chocolate in both cake and frosting for the best flavor. For a deep, rich flavor, choose dark chocolate with a cocoa content of 70% or higher.
- 3. Moisturizing: Adding boiling water to cake batter may seem unusual, but it is important to form a moist, soft crumb. please do not worry. The heat expands the cocoa powder and intensifies the flavor without making the cake too thick.
- 4. Layering Technique: When assembling the cake, make sure each layer is evenly covered with the chocolate pudding filling. This not only adds flavor to the cake, but also helps keep it moist, especially if you want to refrigerate it before eating.
- 5. Decorating Ideas: A classic blackout cake is just covered in chocolate ganache, but you can also get creative with the decorations. A sprinkling of fresh berries, chocolate shavings, or powdered sugar can add visual interest and contrast to the cake’s dark appearance.
- 6. Make-Ahead Tip: This cake actually tastes better the next day as the flavors meld together. So, don’t hesitate and prepare in advance. Store in an airtight container in the refrigerator and bring to room temperature before enjoying for best flavor and texture.
- 7. Serving Suggestion: Serve a slice of blackout cake with a dollop of whipped cream or vanilla ice cream for an even more delicious treat. Pair with a glass of milk or a cup of freshly brewed coffee to balance out the richness.
- 8. A personal touch: Feel free to adjust this recipe to suit your tastes. Add a shot of espresso to the cake batter for a subtle coffee flavor, or sprinkle chopped nuts on top for an extra crunch. Get creative and make it your own!
Frequently Asked Questions for “Easy Homemade Blackout Cake Recipe with Rich Chocolate Flavor”
- 1. How long does it take to make this blackout cake?
- This Blackout His Cake recipe takes about 20 minutes of preparation time, plus about 30-35 minutes of baking time. Allow some time for the cake to cool and frost before serving.
- 2. Can I use this recipe instead?
- Although we recommend following the recipe closely for best results, there are some substitutions you can make depending on your dietary preferences and available ingredients. For example, if you are sensitive to gluten, you can use alternative flours such as gluten-free flour. Additionally, you can swap out certain ingredients, such as the type of chocolate or type of milk used (such as almond milk for a dairy-free version). However, keep in mind that using substitutes may slightly change the taste and texture of the finished cake. Always be aware of potential allergens when making substitutes.
In summary, this easy homemade blackout cake recipe provides a decadent chocolate experience. With its moist layers, creamy frosting, and rich cocoa flavor, it’s a delicious treat for chocolate lovers. Please enjoy this rich and satisfying dessert.